
How to create and simulate a single Bilinear filter stage
Start AnadigmDesigner®2.
If this is the first time you have started AnadigmDesigner®2, it will want you to enter registration data.
If AnadigmDesigner®2 has been registered, the AnadigmDesigner®2 main screen will appear as follows:
The "Continue with default chip" button causes the default chip to be used. The default chip may be chosen by accessing Settings – Preferences – Chip – "Default type for new chips ".
The "View the tutorial" button leads to this tutorial.

Choose the Edit Menu item Insert new
CAM or click on the toolbar icon  to bring up the Select CAM window:
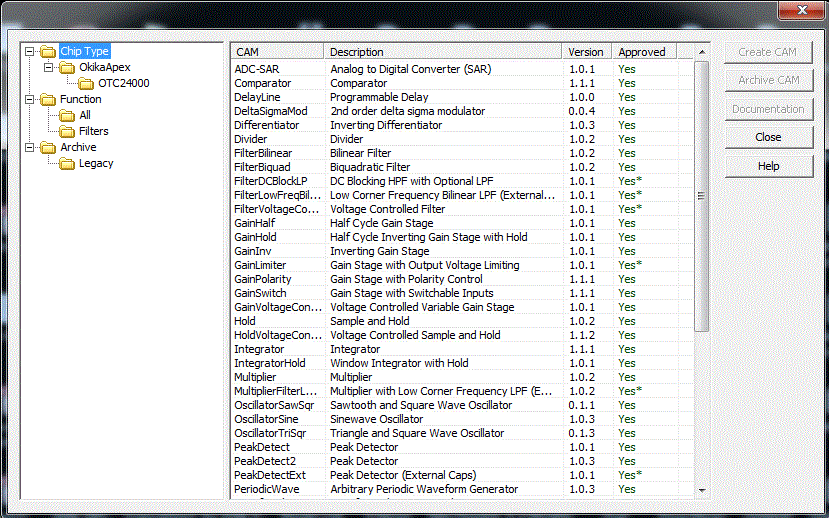
In the CAM Browser panel above, left-click on FilterBilinear - Bilinear Filter, and then left-click the Create CAM button.
If the cursor is then dragged about inside the main window, a "ghost image" of the CAM will move with the cursor.
Drag it until it is inside the "chip" boundary. Note that as it is dragged, the cursor will sometimes change to another form. If the CAM straddles a chip boundary or it is over another object, the cursor will turn into a green NO symbol:

This means that the CAM cannot be placed there but it can be placed if it is moved to another location.
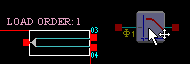
If the cursor becomes a red NO cursor:
it means that the chip that the CAM is over cannot accommodate it because it needs components that are either being used by other CAMs that have already been placed within that chip, or the chip does not support this type of CAM. CAMs that have been placed within a chip can be moved by using the click-and-drag operation to move them to a new location. CAMs can also be placed temporarily outside of a chip boundary for convenience.
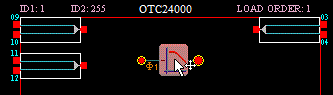
When the CAM is inside the chip boundary where it is legal to place it, left-click on it and it will be placed.
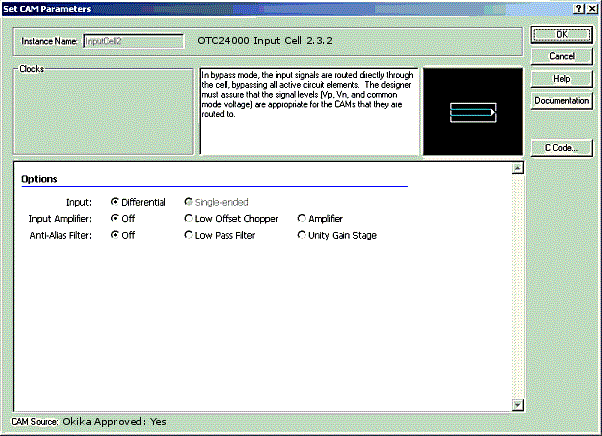
This will bring up the Set CAM Parameters window:
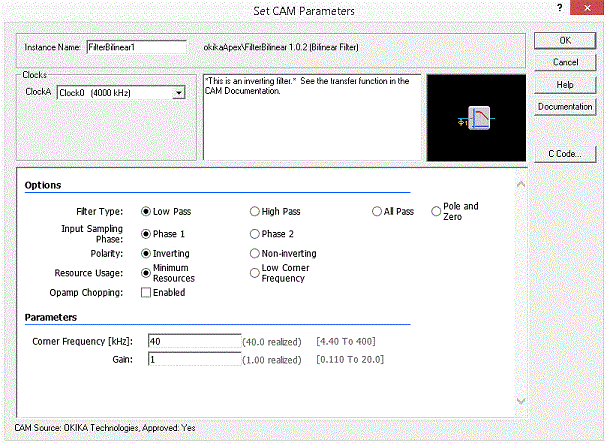
Note that the above window is "dynamic", i.e., as different CAM Options are selected, different CAM Parameters may appear that are relevant to the particular option selected. Also, comments may appear in the Notes field related to specific options. The Symbol will also change depending upon the options chosen. For this example, we will use the default as shown above. This will be a low-pass filter with Corner Frequency, Gain as shown above. Press OK to close this window.
Wiring can be accomplished in multiple ways. The quickest way is to move your mouse cursor over the contact you want to connect a wire to. The cursor will change into the wiring cursor:
Press the Left-Mouse Button to start the connection, drag the wiring tool towards the connection you wish to make, and then release the Left-Mouse Button when you are satisfied with the connection.
NOTE: You can also explicitly change to wiring mode by
clicking on the wiring tool  in the tool-bar (or by pressing the "W" key).
Once in wiring mode the closest valid connection point will
highlight as you move the wiring tool around the screen. You can
then make a connection by pressing the Left-Mouse Button and
dragging the tool towards the point you wish to connect to as
explained above.
in the tool-bar (or by pressing the "W" key).
Once in wiring mode the closest valid connection point will
highlight as you move the wiring tool around the screen. You can
then make a connection by pressing the Left-Mouse Button and
dragging the tool towards the point you wish to connect to as
explained above.
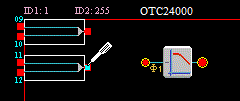
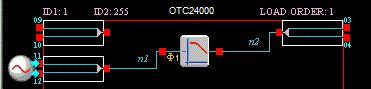
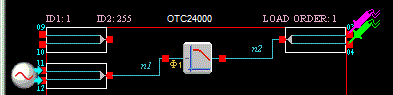
Using either method, connect a wire from the output contact of an input IOCell to the input contact of the CAM and another wire from the output contact of the CAM to an input contact of an output IOCell as shown:
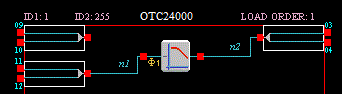
Note that the wires are associated with node names that are displayed. You can edit these names by simply clicking on the node name, and typing in a new one. The Settings menu, Wires Preferences window can be used to inhibit the display of the wire node names if desired.
Now select the menu item "Simulate/Create Signal Generator" or
click on the  symbol in the tool bar (you can also press the shortcut key
"G"). This will display a "ghosted" signal generator symbol
that may be moved about and placed on an input contact of any input
IOCell. Place it on the input contacts of the second input IOCell
on the left as shown:
symbol in the tool bar (you can also press the shortcut key
"G"). This will display a "ghosted" signal generator symbol
that may be moved about and placed on an input contact of any input
IOCell. Place it on the input contacts of the second input IOCell
on the left as shown:
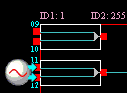
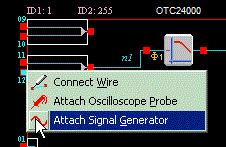
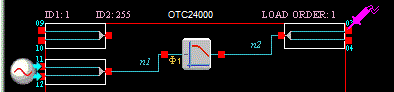
You can also place a new signal generator by pressing the Right-Mouse Button while the mouse is over an input contact of any input IOCell, and selecting the proper context-menu item:
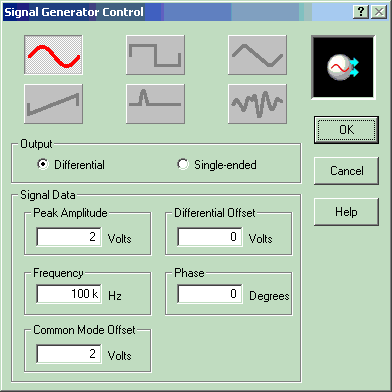
Place the cursor over the signal generator symbol that is being displayed on the screen and double-click the left mouse button. The Signal Generator Control window will appear. Leave the frequency set to 20 KHz. Note that we are using a "differential" probe. Set the Peak Amplitude of the signal to 2 Volts. Then left mouse click the Done button.

Place the cursor over the second input IOCell on the left (the one to which the signal generator is attached) and double-click the left mouse button. This will bring up the Set CAM Parameters window for the IOCell. In the CAM Options areas, set the Anti-Alias Filter to Low Pass Filter. (Note that the OTC24000 is "fully differential" so normally expects two "differential inputs". We have provided a differential signal by using a differential signal generator.)
Our circuit now looks like this:
Now we need to connect an oscilloscope probe to the top output
contact of the upper output IOCell (contact 03). Select the
Simulate menu item Create
oscilloscope probe or left-click the  symbol in the tool bar. A
"ghosted" oscilloscope probe will appear when the mouse is over the
main window. Drag the oscilloscope probe so that it is over the
upper output IOCell’s top contact then left-click to place it.
symbol in the tool bar. A
"ghosted" oscilloscope probe will appear when the mouse is over the
main window. Drag the oscilloscope probe so that it is over the
upper output IOCell’s top contact then left-click to place it.
You can also place an oscilloscope probe by pressing the Right-Mouse button while over the contact and selecting the proper menu item.
We are now ready to simulate the circuit. Select the simulation
icon,  , or the
Simulate menu item Begin
Simulation or press the F5 function key on the keyboard to
begin the simulation. When the simulation completes, the
oscilloscope screen will be displayed with the results of the
simulation:
, or the
Simulate menu item Begin
Simulation or press the F5 function key on the keyboard to
begin the simulation. When the simulation completes, the
oscilloscope screen will be displayed with the results of the
simulation:
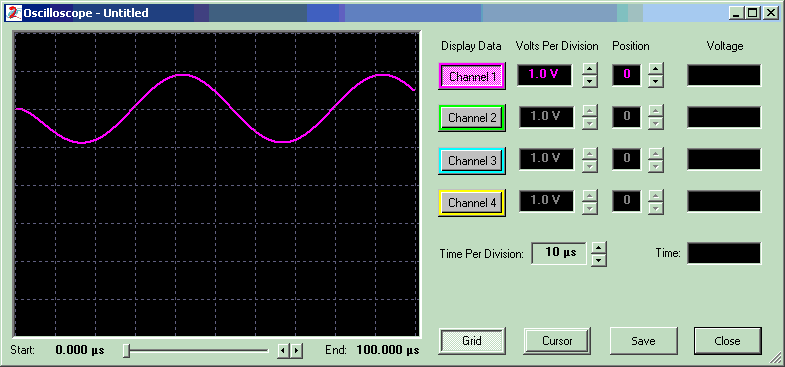
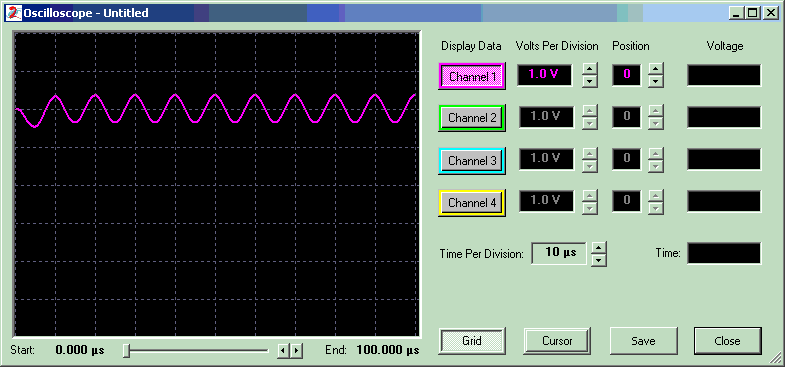
Note that on the left edge, we see a small startup transient. Also note that we see a signal that is 1 Volt peak-to-peak instead of the 2 Volt peak-to-peak signal that the signal generator is producing. This is because the oscilloscope probe is looking at only half of the fully differential signal that is being output. If we put an oscilloscope probe on the other output as well:
The data for each circuit node was saved during the last simulation. Placing the new probe causes the oscilloscope to display the following:
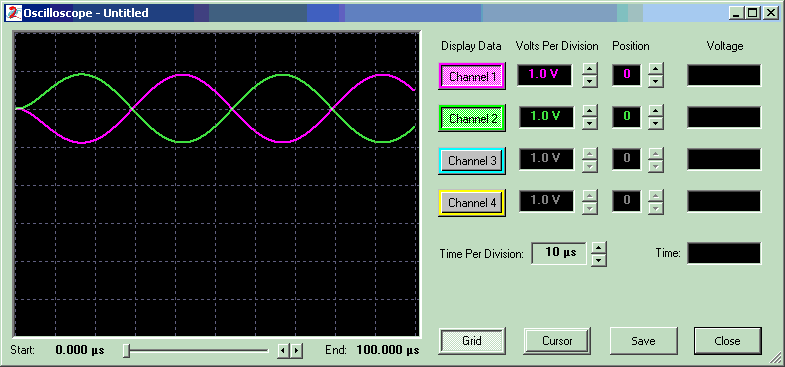
If we were to invert one of these signals and add it to the other signal, we would have the full 2 Volt differential signal that the chip is producing.
Now double-click (left mouse button) the image of the signal generator to bring up the Signal Generator Control window. Set the "Frequency" to 100 KHz and click the "Done" button.
Remove the second oscilloscope probe (place the cursor over the
probe, right-click the mouse and select "delete" from the popup
menu) and rerun the simulation by pressing the button, or the Simulate menu item Begin Simulation or
press the F5 function key. When the simulation completes, the
oscilloscope screen will display the results of the new
simulation:
Note how the signal has been attenuated to less than half of its original strength since the input signal (100KHz) is above the corner frequency (40 KHz) of the Bilinear filter stage.
If you have an Okika Evaluation board and if it is plugged in to the serial port, you can download the circuit configuration bit-stream to the board. This will program the Okika Dynamic Analog Matrix on the board. By attaching real signal generators and oscilloscope probes to the board, you can verify that the circuit is indeed behaving just as the simulator indicated it would. Note that the DynAMx is reprogrammable so you can make circuit changes, download and test indefinitely.
In addition to writing a configuration bit-stream to the Okika board, the bit-stream for one or more DynAMx chips can be written to a file using one of a variety of formats suitable for programming a ROM chip. The ROM chip can then be used to program the Dynamic Analog Matrix(s) in a board designed by a user.
There are also additional embedded systems programming Dynamic Configuration tools (algorithmic and state-driven) that will produce C code that will allow the Dynamic Analog matrix to be programmed by a microprocessor on a board developed by the user. The C code contains functions that will allow circuit parameters and even circuit topology to be changed on-the-fly under microprocessor control.
That concludes this example.