This window is used to select and create new CAMs to be placed in your design.
Libraries and CAMs
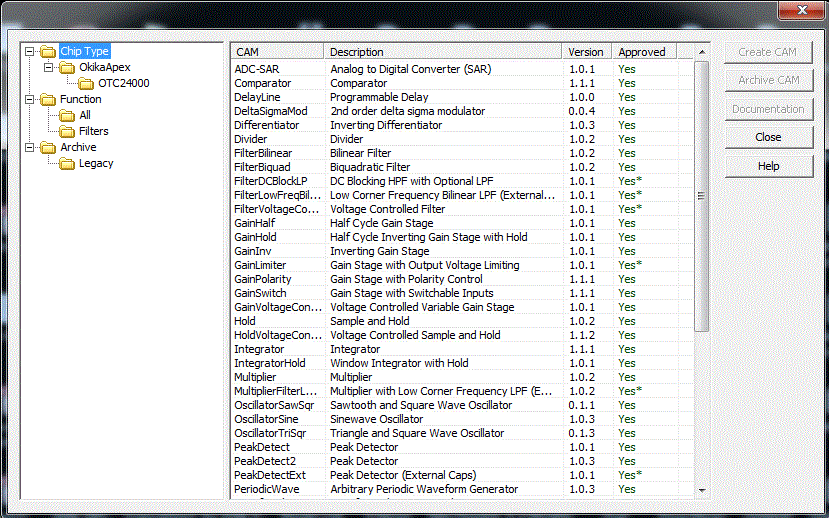
Every CAM is a member of a CAM Library. The left side of the Select CAM window lists all of the libraries that are available in your system. By selecting the name of family, function or archive all of the relevant CAMs will be listed in the on the right.
The CAM Browser has intelligence that allows it to know which CAMs will work in which chips thus simplifying the CAM selection process.
The CAM Browser will display the CAM file name, the descriptive name of the CAM, the CAM’s version number, and the approval status of the CAM. In the figure below, the OkikaVortex library is selected, and all of the CAMs in that library are listed. If a CAM listed in the right-hand window is not grayed out, it means that it will work in the currently selected chip (the one with the red border on your screen.) You can, in the left-hand window, select a particular chip such as the OTC24000 and see its allowable CAMs in the right-hand window. The example below shows that OkikaVortex has been selected and the right-hand pane has only one grayed-out entry. Each of the non-grayed out CAM entries may be used in the currently selected chip.
If "Chip Type" had been selected on the left, then some of the Version fields might contain an asterisk instead of a version number. This would mean that there are different physical CAMs supporting different chips.
An unapproved CAM, MultiplierFilterL…, has been added to this library by a user. (An "unapproved" CAM is simply a CAM that has not been fully tested and approved by the Okika engineering staff. Unapproved CAMs are CAMs which have been built by Okika engineers to perform a specific narrow function within a specific application circuit as requested by one of Okika's customers. These CAMs function as expected within the original target application; they may or may not also function adequately or as expected within other application circuits.) Unapproved CAMs that are not grayed out are listed in blue lettering to make it clear that they are unapproved CAMs.
An asterisk in the "Approved" field means that the CAM is approved but contains non-standard features. Highlight the cam by clicking on it and use the Documentation button to see the CAM's features.
Creating CAMs
To create a CAM to add to your design, select the CAM you want to add and click the Create CAM button. This will create a new instance of the selected CAM, close the window, and allow you to place the CAM on your design. If the Display settings dialog upon creation of new CAM preference is enabled, the Set CAM Parameters window will be displayed upon placement of the CAM.
It is also possible to drag CAMs from the CAM Selection window directly on to your design. This allows for creating many CAMs without having to close the CAM Selection window. First click on the name of the CAM you wish to create. While holding down the mouse button, begin to move the mouse cursor toward your design. This will create the CAM and allow you to drag and place it on your design.
CAM Documentation
Each CAM has a documentation file associated that provides details on using the CAM. To display the documentation for a CAM, select the name of the CAM in the list on the right and click the CAM Documentation button.